Sunday, November 20, 2011

Me Oh My, Pie!

Remember that goofy pie song Andie MacDowell sings in the movie "Michael?"  It sticks in my head...
Anyway...it's pie season.  And why is that?  Why isn't it always pie season?  Unless it's an icebox, or no-bake pie, we don't seems to eat as much during the summer.  Obviously, nobody wants to heat up the kitchen with baking, and a lot of really good pie ingredients aren't in season until the fall, like pumpkin and apple. So, it's pie season.  And if you know me well, you know that when I do crave a sweet, I really like pie.  Better than most cakes.  One of my favorite recipes is Don's grandmother's Chocolate Pie.  It's so good.  And beautiful.  I like the meringue challenge.  When it comes out well, it can be a thing of beauty.  I made it recently-a few weeks ago actually-sorry for not posting sooner.  Mom's gotten to where she makes the pie crust recipe in the Strand Family Cookbook and it makes a few crusts at a time, so when I saw that she was making a batch, there was no way I was going to let all of it go to the freezer.  The good thing is, we always have the Chocolate Pie ingredients handy.  I'll bet you do, too.  Here ya' go:

Chocolate Pie

Mary Jane Emerson

Make (or thaw) pie crust, place in pie pan and prick bottom and sides with a fork.  Bake until golden brown and set aside.
Separate 3 eggs and let sit at room temperature for 30 minutes.

1 C. sugar                                             
4 T. flour
¼ t. salt                                                 
2 C. milk
3 egg yolks (from above)                     1/3 C. cocoa
1 T. butter                                             1 t. vanilla

Mix and sift dry ingredients.  Put in large saucepan over medium heat and add milk.  Once warm, add cocoa and dissolve.  Add egg yolks, then butter, then vanilla.  Stir constantly and cook till stiff.  Pour into baked crust and set aside.  Make meringue:  In a small mixing bowl, combine ¼ t. cream of tartar and egg whites.  Beat on high till foamy.  While beating, add 6 T. sugar, one at a time.  Add ½ t. vanilla and continue to beat until stiff peaks form.  Cover chocolate with meringue making sure to cover completely and seal meringue all the way to edges, touching crust.  Bake till brown in a hot oven.  Let sit for a few hours before cutting.

Gosh it's good! Just look at that meringue.  I love to let it get really brown on the peaks--they come out a little chewy.  In a good way. 

So this is my ode to pie, and to Granny Emerson, of course!

Here's that "Never Foil Pie Crust" recipe in the Family Cookbook, submitted by Aunt Louise:


Never Foil Pie Crust

Louise Strand Russell

1 lb. Lard
5 ½ C. flour
1 t. salt
Blend together until pea sized.  Make a well.

2 beaten eggs
1 T. vinegar
Water to make 8 oz.
Combine and add to flour mixture-mix well.

This is a good crust.  Does not mind handling—in fact, quite likes it.  I cut this into 5 portions and freeze.

Happy eating.  And Happy Thanksgiving! 

Sunday, October 2, 2011

Potato Leek Soup

I think it should be "Leek Potato Soup."  In my mind, the potatoes are secondary, but since I borrowed a recipe, I'll stick to the original name.  I've made this before, but I don't know what happened to that recipe so I had to go hunting for another.  This one comes from simplyrecipes.com.  I already had an idea about what I wanted to do, but I didn't want to screw up the method.  And I had leeks I bought a few weeks back at the farmer's market so I needed to get them into something.  It's not quite soup weather yet (might have gotten up to 90 today), but we're getting closer.  I love leeks and I don't know why I don't use them more often.  Even a little sprinkled in a salad would be awesome.
I love the way the leeks break down in the pot.  A little stirring, cover it up, come back a few minutes later to take a look and voila!  It's like spinach, or any greens for that matter.  Okay, I'm easily amused; or amazed.

What I love about this recipe is that once everything has simmered down, you remove half of it, blend it, and add it back.  That way you get the creaminess, but still lovely chunks of potato and ribbons of the leeks.  The only thing I added not on the list was during the simmering--two bay leaves.  When it was time to purée, I removed them.  I did use four cups of chicken broth rather than two cups broth and two cups water.  And at the end, I sprinkled grated Parmesan in rather than adding more salt.
I think the most time consuming part of the entire recipe is the cleaning and cutting up of the leeks.  The problem is that they're so dirty, you have to take them completely apart, rinse them well, then they don't go "back together" if you know what I mean and you have to pile them up and hold them tightly while cutting.  It made me think of when Lucy is in Havana making cigars and she keeps adding tobacco leaves and rolling them up till she has this HUGE cigar...but I digress.  That's sort of how I handled the leek "layers."
I may have mentioned before, mom makes homemade bread pretty often, so we had our soup with oven toasted (and slathered with butter) buttermilk bread she recently made.  Yum!

Happy eating!

Sunday, September 11, 2011

Norwegian Waffles

Back to my roots.  My mother's father came over from Norway to Canada in 1913.  He was the first of three brothers that traveled over for work.  Luckily they stayed in touch with the rest of the family back in the homeland, and we've been blessed to stay in touch with uncles, aunts and many cousins over the years.  My mother and her siblings have held true to their Norwegian roots and have many traditional recipes to show for it.  One in particular that I love are Norwegian Waffles.  My Aunt Alice provided this recipe for our "Strand Family Cookbook" that I complied in 2007 for Mom's 70th birthday celebration.  And when everyone came to Texas that Spring, Aunt Alice brought her waffle iron.  It was my first exposure and I've been hooked ever since.  As a matter of fact, Mom and Aunt Meme went out and bought two waffle irons identical to Alice's.  We have a great waffle iron, but this particular one makes these waffles especially good.  And proper.

Last weekend (Labor Day) I decided we were long overdue, so I assembled all the ingredients and got busy.  There is some time involved in making these, but they are so worth it.


Norwegian Waffles


Alice Vivian


5 eggs
½ C. sugar
1 C. flour, sifted
1 t. ground cardamom
1 C. sour cream
4 T. unsalted butter, melted

Beat the sugar and eggs together for 5 to 10 minutes. Alternately fold in half the flour, cardamom, and the sour cream, then the remaining flour. Lightly stir in the melted butter and set the batter aside for ten minutes.
Cook according to directions for the waffle maker. Serve with Lingonberries.

Go for the 10. 10 minutes of beating, and once everything is incorporated, 10 minutes of resting. This becomes a beautiful, fluffy batter. Lingonberry jam is a favorite, along with sour cream. Another item Aunt Alice introduced when she first made the waffles for us is Ski Queen cheese, which is also wonderful with these waffles. You can definitely treat these more traditionally with butter and syrup, but please try one without anything first. The texture is so creamy, and the taste of the cardamom (sometimes also spelled "cardamon") gives it such a warmth. Cardamon is a Himalayan spice, relative to Ginger, but don't think of it as "bitey" as ginger, more warmth like cinnamon or nutmeg.

On this particular day, I didn't have any Ski Queen cheese, but I did have Laughing Cow Lite Creamy Swiss wedges, and it worked great with the Lingonberries. Experiment...but stay close to your roots.


Happy eating!

Saturday, August 20, 2011

Chicken Fried Steak = Love

Don requested Chicken Fried Steak, so I made it tonight.  But his request was specific; there had to be home fries, Texas toast and cream gravy.  Just like at Dee Tee's in Midlothian.  Dee Tee's is one of those timeless places that serves good ol' comfort food.  And nothing else.  Tried and true recipes over the course of many years.  And while Don hasn't been there in a long time, his fond memories include Chicken Fried Steak.
I have a recipe that I've only ever used once before and remembered that with a little adjusting, it would be good.  And it was.  I just don't make CFS very often; it makes a mess of the kitchen--it's a lot of oil, etc.  And I sure wasn't cooking it outside in this heat. Especially knowing I was going to fry the fries, twice.  I like to fry them first to get the inside cooked, then throw them back in and crisp them up.  And I did three batches (so six)--too many to be hanging around a hot pot of oil outside.  I started the fries in a cast iron dutch oven on the stove, then once I got them half done, I started the steaks.  But rewind--the recipe is just making sure your dredging and batter are well seasoned.  I mentioned earlier that I knew I wanted to adjust some things from the previous time I used this recipe.  You know how I love the Food Network, and this is a Tyler Florence recipe.

Chicken Fried Steak and Gravy

  • 2 pounds beef bottom round, trimmed of excess fat (already processed cube steak works fine!)
  • 2 to 2 1/2 cups all-purpose flour
  • 2 tablespoons garlic powder
  • 2 tablespoons onion powder
  • Kosher salt and freshly ground black pepper
  • 3 whole eggs, beaten
  • 2 cups buttermilk or whole milk
  • Hot sauce, to taste
  • Vegetable oil
  • 3 heaping tablespoons all-purpose flour
  • 1 cup buttermilk
  • 1 cup whole milk
  • Kosher salt and freshly ground black pepper
  • Hot sauce, to taste
Directions


In a medium flat dish add the flour, garlic powder, onion powder, kosher salt and pepper, to taste, and combine well. In another flat dish stir together the eggs, buttermilk and hot sauce, to taste, and season well with salt and pepper, to taste. Cut beef into 4 (1/2-inch) thick slices then pound out using the teeth side of a meat mallet. This tenderizes the meat. Dredge each piece of meat in the seasoned flour, then in the seasoned buttermilk and back into the flour, allowing excess to drip off. Set out on a rack fitted over a baking sheet and allow to rest in the refrigerator for 20 to 25 minutes before cooking.
Add about 2 inches vegetable oil to a large cast iron pan and heat over medium-high heat to 365 degrees F. Once heated and working in batches, fry steaks 2 to 3 at a time until golden brown, about 3 to 4 minutes per side. Remove steaks and drain on a paper towels.
Carefully remove some the fat from the cast iron pan, reserving 1/4 cup. With the pan over medium heat, sprinkle in 3 tablespoons of flour and whisk to make a roux, scraping up any brown bits on the bottom of the pan. Once the flour has been fully incorporated slowly add the buttermilk and milk and continue to whisk until the gravy is nice and thick. Season well with salt and plenty ground black pepper, then whisk in hot sauce, to taste. Place the steaks on a serving platter, top with gravy and serve.

The only adjustments I made was not to use any hot sauce, never have (sorry, Tyler, don't see the point) and I use less garlic powder and onion powder.  Not much, just remembered those seasonings coming back to haunt me last time.  So I cut those down to about a tablespoon each.  I did have some buttermilk, so I mixed it with whole milk for the batter.  I think what makes this nice is the dredging, battering and back to dredging.  It ensures that the breading will stay on throughout the cooking process.
But really, the star of this show is the gravy.  I used my super large cast iron skillet for the steaks, and once I'd removed most of the used oil, the gravy came alive.  There were just enough beautiful bits in the pan to make it wonderful.  And my weird thing (works every time!) that I do to make sure I get the salt right is--I hover over the pan and smell the steam coming up.  When it's a little "salty" I know I've added enough.
Needless to say, we over-ate.  Mom made the Texas toast on the electric griddle (remember--I had a mess going on over at the stove!) and it was lovely.  Buttery and crispy all in the same bite!

Well, gotta have some comfort food occasionally, right?  Thanks Don, for your request.  We all came out winners on this deal.

Happy Eating!

Sunday, July 24, 2011

Baked Egg

I never turn down an opportunity to make eggs for breakfast.  Especially on the weekend when I have a little more time to mess around with different recipes.  This morning I was feeling "Baked Eggs."  I found a recipe online, actually on another blog that I love to go to any time I'm interested in finding something new to bake-- "pete bakes!"  I've never met Pete; never even corresponded with him, but he is obviously a great cook.  And he's not afraid to jump out there and try new things on his own.  Of course, what drew me to his page are his beautiful pictures.  After all, he is a graphic design artist, illustrator, etc.  I'd expect nothing less.  Here's a link to his food blog:
http://www.peterandrewryan.com/baking/
And here's his recipe:

baked egg

recipe makes 4 eggs (1 egg per small ramekin). if using a larger ramekin, adjust measurements accordingly.

1/4 tsp minced fresh garlic
1/4 tsp minced fresh thyme leaves
1/4 tsp minced fresh rosemary leaves
1/2 tsp seasoned bread crumbs
1 Tbsp freshly grated parmesan
1 Tbsp crumbled cooked bacon
4 large eggs
2 tablespoons heavy cream
1 Tbp butter
salt and pepper to taste

1. preheat the broiler while you prepare the ramekins.

2. combine the garlic, thyme, rosemary, parmesan and bread crumbs. add 1/4 Tbsp butter and 1/2 Tbsp heavy cream in each ramekin. put the ramekins on a baking sheet and place under the broiler for 2-3 minutes, until melted and bubbly.

3. remove the ramekins from the oven and very carefully crack 1 egg into each. quickly sprinkle with the crumb/herb topping and place back in the broiler for anther 2-3 minutes. the eggs will continue to cook after you remove them from the oven. let cool for 1-2 minutes before serving warm.
I love my little ramekins (World Market) and they're perfect for this dish.  The only thing I have to watch out for is that my broiler is so hot, that my toppings get "done" before my eggs, so I pull them out from the broiler once they're "crusted" and turn the oven off, then set them back in for just a couple more minutes.  The egg comes out perfect.  The white is done just right and the yolk is creamy and rich.
You'd think that with garlic on the list of toppings it would be the strongest flavor, but not so.  I find the rosemary and thyme are the bigger stars, which I love.  And of course you can adjust according to your taste.  My hat's off to Pete!

Happy eating.

Sunday, July 10, 2011

Family Favorites

Everybody has them.  Grandma's pie, Aunt Bertha's pickled beets, etc.  Dishes that show up at family gatherings and become mainstays that are passed down for generations.  A while back, Sara and I were reminiscing over some dishes that really stand out in our minds, and she was telling me about her mom's "Green Chili Mashed Sweet Potatoes."  I was really intrigued by this.  Sara's from northern New Mexico and her family has access to Hatch Chilies, so I can just imagine that these yummies make their way into all kinds of traditional dishes.  Of course, we're used to the more southern (deep south maybe?) version of making sweet potatoes, well, you know--sweet.  With brown sugar, butter, marshmallows, caramelized nuts; even oven fried ones are more likely to get sprinkled with cinnamon and sugar.  So Sara's mom shared this recipe and I've finally gotten around to trying it out.  We had BBQ beef brisket this weekend with Bleu Cheese Coleslaw, Baked Beans and Sweet/Hot Pickles, so instead of a cold potato salad, I went for this.  I found a small can of mild Hatch chilies at the store--figured I'd better start out mild...

This was SO GOOD!  Boiling the sweet potatoes with garlic is a great start to it's savory trek; nutty Parmesan cheese helps it right along and POP!  The chilies give it a great finish.  I loved keeping it in my mouth and tasting everything coming together.  My hat is totally off to you, Arna Rhodes, for stepping out and trying something non-traditional.


Green Chili Mashed Sweet Potatoes
6 medium sweet potatoes, peeled and cubed
4 cloves garlic, peeled
2 cups water
1 tsp salt
2/3 cup whole milk or half & half
2 tbsp butter
1/4 cup freshly grated Parmesan cheese
Green chilies to taste (I used 2/3 of a 4 oz. can of mild; next time I'll definitely use the whole thing!)

Preheat oven to 350º F.  In a medium saucepan over high heat, place sweet potatoes, garlic, water and 1/2 tsp salt.  Bring to boil.  Reduce heat to low and cook, covered, until tender, about 15 minutes.  Drain well.  Return to pot and add milk and butter and beat with a hand held electric mixer until smooth.  Add cheese and green chilies and beat until fluffy.  Turn sweet potatoes into a 2.5 quart casserole dish lightly coated with cooking spray.  Cover and bake until heated through, about 20 minutes. (I have a confession to make:  I just noticed "cover" - I didn't cover!  Sorry!  But you know what--it was great anyway.  It formed a little "film" on the top, not much--and it was lovely!)

Thank you so much for sharing a great family recipe!

Happy eating.

Friday, May 27, 2011

"These are a few of my favorite things..."

I'm taking a vacation day today, so I'm just taking it easy, and eating when I want to. Gonna have a swim later. For lunch on a lazy day like this, I love to make bruschetta. Today I put together a very simple one to top my crostini. (Crispy, crusty bread. I grilled some Asiago Cheese bread last night with our shish-kabobs, so the leftovers are crostini today.) I cut up some grape tomatoes and fresh basil, tossed them with olive oil, kosher salt and cracked black pepper. Heaped it all on my bread and toasted it in the toaster oven for several minutes, broiling for the last few. After it came out, I shredded Pecorino Romano cheese on top. At that point I sometimes put it back in the oven to toast the cheese, but didn't want to this time. Remember--it's my day off! Something else I usually add but didn't this time is fresh, minced garlic. It gives it such a great pop. If I don't want it too garlicy, I have been known to just take a cut clove and rub it all over the bread before it goes in the oven. Not nearly so strong that way. I think everyone makes a bruschetta similar to this. I just love the freshness of the tomatoes and basil. I also love using roasted red peppers too. And I think the Pecorino Romano is so good; you don't always HAVE to use Parmesano Reggiano. Though it is equally as good.
Here's to the lazy, hazy summer days to come. Happy Memorial Day!

And happy eating.

Sunday, May 8, 2011

Office Lunch

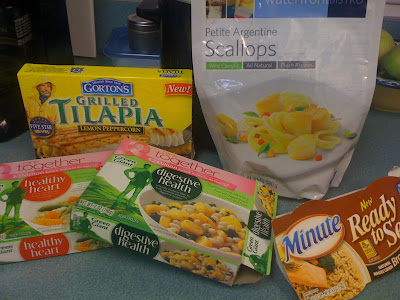
One day this week I decided it was time to clean out the office freezer. I didn't bring lunch and didn't want anything that was in my "back up bin." With 5 different food personalities in the office, we can get quite a conglomeration of items in the fridge and freezer. And as time passes, we forget (especially) about stuff in the freezer. We even forget who brought what. So I went looking to see if there was anything salvageable for a lunch. I found two frozen veggie packs, a tilapia fillet, and some scallops. I thought soup would be the most likely thing to make, so I rummaged through the cabinet and found a packet of chicken broth, some dried herbs and some pre-cooked rice. The frozen veggies had veggies of course, but also barley and beans for more starchy filler.
After verifying that no one was claiming any of it (I knew the scallops were mine), I threw everything but the scallops and fish in the crock pot. Yes, I keep a crock pot at the office. Hey, you never know. I have an electric wok and we have a George Foreman grill, and our standard microwave and
toaster oven. We're set for anything.
So a couple of hours on high and it was starting to smell pretty good. I added a little more salt and some grated parmesan, then close to time to eat, added the scallops and broke up the fish and added it.

Sara stirred. (I tried to give her more credit than that, but she insisted.)
Brent donated a loaf of bread that had a few pieces left, and I made croutons out of it in the toaster oven. They were a good topping for the soup. So that's the way it went. Office lunch out of basically anything. And more room in the freezer.
Moral: don't be afraid of coming up with a soup. Soup is large and roomy. You can add to it. And it's very forgiving. Just don't put anything in it you wouldn't eat otherwise and you're safe.

Happy eating!

Sunday, February 27, 2011

The Simplest Things in Life...and cooking.

Some days I just don't feel like getting every pot and pan dirty. I don't like grocery shopping, and hate trying to find ingredients I don't have readily available. On days like this (like today), even though I did go to the store, I knew I didn't want to spend the entire day in the kitchen. I've always felt that "less is more," and I catch myself shying away from dishes that require tons of ingredients. Not that it seems daunting--though it probably would be time consuming, not to mention expensive--I just think that too many ingredients can muddle the flavor of dishes. I like to be able to identify and taste everything. I tend to go for recipes with ten items or less. Today, I took a major shortcut. I was digging around in the pantry (ewwwww, dark scary place!) and found some "Peach Jezebel Sauce" I picked up a few years ago from one of our favorite stopping places when we go to the Texas Hill Country--New Canaan Farms. They make jellies, salsas, sauces, marinades--anything you can put in a jar. And yes, a few years ago--so! It wasn't opened yet. Hey, I will admit--on this quest for a marinade, I found a jar of sun-dried tomato and olive relish that said "best if used by April 2003." That one I did throw away. That means we moved that jar here when we moved to this house. And I know inquiring minds want to know, yes, I opened it and smelled. It was kind of dark and very strong with balsamic vinegar. It was time to go. But I digress. I remembered that the Peach Jezebel was a great sauce for chicken and pork, and it just so happens I had some chicken thighs I'd been wanting to get out of the freezer, so this was perfect for that. And only this. I marinated and baked the thighs in it, and it was great. Only a few ingredients in the sauce--and you could use any variation of these, switch some things out, etc. Peaches, pineapple, apple cider vinegar, dry mustard and horseradish are the base. Use apricot preserves, use honey mustard. Just blend it all together to taste. A little chunky is good. I baked the thighs for almost an hour at 350º, basting with the juices halfway through. It was really good. And really simple. We had it with kale that I sautéd with some red onion, oregano and dill. Great for eating in front of the TV (Oscars are on tonight).
I almost forgot to take a picture, so you're seeing the last poor thigh sitting in the Pyrex® dish waiting for it's Tupperware®.


So don't get too caught up, you might miss something SIMPLY wonderful.


Happy eating.

Thursday, February 3, 2011

Ice and Bacon Cheddar Scones

Well, my last post was "Snow and food..." so that looks to be the pattern these days-it seems to be all about the weather! We're "iced in" here in north Texas this week and it lends to lots of eating, meaning cooking. This is our third day in a row to work from home, so I have lots of access to the kitchen. It's unfortunate because I think I've gained five pounds since Sunday. And for some reason, there's a big bacon campaign going on here. (Did you just meet me?) Started the day Tuesday with Bacon Cheddar Scones. Tuesday night we had Refried Bean Tostadas, so of course they were made with bacon grease. Last night we had hot dogs wrapped in bacon and put under the broiler--shredded cheese and chili accompanied. Don't worry, I paid later. Then tonight, we're having BLT's with Tomato Bisque soup. What?
Back to the scones. Not to sound haughty, but I'm kind of known for my scones. I usually make a sweet variety--my all time fav are raisin, but I change it up, too. So it made sense to make them savory for a change. I have a great book of scones and biscuits by Elizabeth Alston, and everything I've ever made from that has been great. It's even taught me to step out and try some things on my own, so that's what this was. And I should note--I prefer making my scones "soft." By this I mean that I bake them touching, so the edges are soft when pulled apart, unlike the ones baked separated so that all sides are crusty. Just a preference.

So here's the basic recipe--anyone who makes their own buttermilk biscuits is well on their way:

2 C. All-purpose flour
2 t. Baking powder
1/2 t. Baking soda
1/2 t. Nutmeg
1/2 t. Salt
8 T. (one stick) Cold unsalted butter
Yolk of one large egg
3/4 C. Buttermilk or plain yogurt
White of one large egg
1 C. Crisp bacon, crumbled
1 C. Shredded cheddar cheese
Sugar, salt and pepper for sprinkling

Heat oven to 350º F. Put flour, baking powder, baking soda, nutmeg, and salt into a large mixing bowl; stir to mix well. Add butter and cut in with a pastry blender or rub in with your fingers (I do both), until the mixture looks like fine granules. Add egg yolk to buttermilk (I never have buttermilk--make some with regular milk and lemon juice.), whisk with a fork to blend, then add to flour mixture and stir till a soft dough forms. Add the bacon and cheese, and mix in accordingly, finishing blending it in by turning all the dough out onto a floured surface and kneading it a few times. Cut the dough in half and knead each half briefly into a ball; turn smooth side up and pat into a 6-inch circle. Cut each circle into 6 wedges, but don't separate the wedges. In a small bowl, beat the egg white with a fork until broken up, and brush the top of each circle of scones, then sprinkle with a little sugar, kosher salt, and a tiny bit of pepper if you want. I didn't do the pepper on the ones in the picture. With a pancake turner, transfer both circles onto a lightly greased cookie sheet. If necessary, reshape the circles to make sure the wedges are touching.
Bake 18-22 minutes, until medium brown. Cool on a wire rack, then after about five minutes, pull the wedges apart and cover loosely with a dish towel.
And what I've found when making any biscuits or scones--get everything to room temp before you begin, except the butter. Keep it cold until you cut it in. It makes the dough so nice.
These were really good served warm with apricot jam.
Happy eating!

Sunday, January 9, 2011

Snow and Lobster Bisque

Happy New Year! It's January 9th and we're having our first snowfall of 2011. Kind of exciting, since we seldom get any. And what does a snowy day in North Texas mean? Stay inside and cook--at least to me! Mother and I had the good fortune of having lobster tails last night for dinner, so we decided a bisque was in order for today. I don't have a regular recipe, so I went in search on the web and found Red Lobster's. The reason it won out was because it didn't call for sherry, where most do. And I don't have any. Of course, I made a few changes, but nothing substantial, and I did cut the recipe in half as we didn't have that much lobster left over. I also, unfortunately, didn't have the wherewithall to think to save the stock from boiling the lobsters last night, so I substituted chicken stock where it asks for fish stock. Otherwise, I followed it. Here 'tis:


Lobster
Bisque
Serves 4
Ingredients:
  • 6 cups Water
  • 2 cups Dry white wine
  • 2 cups Fish stock
  • 2 each 1¼ to 1½ lbs. live lobster
  • ½ cup Melted butter, salted
  • 1 cup Onions, finely diced
  • ½ cup Carrots, finely diced
  • ½ cup Celery, finely diced
  • 1 tsp. Garlic, minced
  • ½ cup All-purpose flour
  • ¼ cup Cognac (or Brandy)
  • 1½ cups Tomatoes, seeded and diced (fresh or canned)
  • 1 tsp. Paprika
  • ½ tsp. Thyme
  • ¼ tsp. Ground red pepper
  • 1 cup Heavy cream

Preparation:

  1. Place the water, the white wine and the fish stock into a wide, deep pot (or a Dutch oven), and bring to a boil on high heat.
  2. Place lobsters, topside down, in the broth. Reduce heat to medium and cook covered for approximately 6 minutes. With a pair of tongs, turn lobsters and cook covered for another 6 minutes.
  3. Remove lobsters from broth and put them to the side. When the lobsters are cool enough to handle, begin removing the meat from the shell, dicing the pieces into ½-inch cubes. Store the lobster meat in the refrigerator until later. Place the lobster shells back into the broth, reduce heat to a simmer and cook uncovered for 20 minutes.
  4. Strain the broth through a sieve into a container and store in the refrigerator until later. Discard the lobster shells.
  5. Put your pot (or Dutch oven) back on the stove under medium heat. Pour in the melted butter.
  6. Once the butter is heated up, add the onions, carrots, celery and garlic. Sautee for 3 to 4 minutes.
  7. Add the cognac (or brandy) and cook until the alcohol has evaporated.
  8. Mix in the flour, stirring with a heavy gauge spatula or spoon until the mixture is blond in color and has a buttery aroma.
  9. Mix the diced tomatoes, paprika, thyme and ground pepper with the cold broth from the refrigerator. Then, pour the broth slowly into the butter and vegetable mixture. Cook uncovered for 30 minutes under medium low heat, stirring frequently so not to burn.
  10. Remove bisque from heat. Blend small amounts of bisque in blender and then puree. Puree all of the bisque and pour pureed bisque back into pot with remaining amount.
  11. Add chopped lobster meat and heavy cream, heat and serve. If the soup is too thick, thin it by adding milk or water prior to serving.

Chef's Tip: Adding a touch of brandy or sherry to the stock can bring a wonderful touch to this classic lobster bisque recipe.

Beverage suggestions: Chardonnay, Cambria Katherine’s Vineyard

I did use a Chardonnay and though it was perfect for the heavier body I was trying for. I will admit, I did not see the Chef's Tip (until it was too late) about adding a touch of the brandy to the stock, I think I would have liked that. Pays to read it all the way through, right!? Oh, forgot to mention, those oyster crackers--great tip from my friend Judy--toss the crackers in a bowl with a packet of Hidden Valley Ranch powdered dressing mix, and it makes them so yummy, without extra calories! Good for just snacking, or using in soups, bisques, etc.

On a personal note--today is David and Lauren's 1st wedding anniversary. So proud--love them!

Hey, I received a raclette party grill for Christmas, so my next post will be about our first attempt at raclette. Don't know what that means?--I'll 'splain it when I post. Thanks!